A first complete application
In this guide, a full application containing various file systems, with its own custom flash layout will be developed. Options to customize further, such as changing the linker script, adding kconfig options, and changing optimization levels will be presented too.
The whole code can be found in the SDK, in folder examples/gap9/basic/first_app.
Note
Before starting it is recommended to read: Getting Started and SDK Tools Architecture. You may also find a reference of CMake, its command and macros that have been used here in: CMake macros and commands.
A simple Helloworld
First let’s present how to write a simple Helloworld, with its own CMakeLists.txt and an option to choose whether or not to print on cluster.
#include "pmsis.h"
#if defined(CONFIG_HELLOWORLD_CLUSTER)
void pe_entry(void *arg)
{
    printf("Hello from (%d, %d)\n", pi_cluster_id(), pi_core_id());
}
void cluster_entry(void *arg)
{
    pi_cl_team_fork(0, pe_entry, 0);
}
#endif
int main()
{
    #if defined(CONFIG_HELLOWORLD_CLUSTER)
    struct pi_device cluster_dev;
    struct pi_cluster_conf cl_conf;
    struct pi_cluster_task cl_task;
    pi_cluster_conf_init(&cl_conf);
    pi_open_from_conf(&cluster_dev, &cl_conf);
    if (pi_cluster_open(&cluster_dev))
    {
        return -1;
    }
    pi_cluster_send_task_to_cl(&cluster_dev, pi_cluster_task(&cl_task, cluster_entry, NULL));
    pi_cluster_close(&cluster_dev);
    #endif
    printf("Hello\n");
    return 0;
}
menu "Helloworld Menu"
    config HELLOWORLD_CLUSTER
        bool "Enable Cluster"
        default n
        select DRIVER_CLUSTER_L1MALLOC
        help
            By default, only the fabric controller prints a "helloworld".
            Enabling this option makes each cluster cores print a "helloworld" aswell.
endmenu

source "$(GAP_SDK_HOME)/utils/kconfig/Kconfig"
cmake_minimum_required(VERSION 3.19)

###############################################################################
# Panel Control
###############################################################################
set(TARGET_NAME "first_app")
set(TARGET_SRCS first_app.c)

###############################################################################
# CMake pre initialization
###############################################################################

include($ENV{GAP_SDK_HOME}/utils/cmake/setup.cmake)

project(${TARGET_NAME} C ASM)
add_executable(${TARGET_NAME} ${TARGET_SRCS})

###############################################################################
# App's options interpretation
###############################################################################
if(DEFINED CONFIG_HELLOWORLD_CLUSTER)
     message(STATUS "[${TARGET_NAME} Options] Cluster enabled")
     target_compile_options(${TARGET_NAME} PRIVATE "-DCONFIG_HELLOWORLD_CLUSTER=1")
else()
    message(STATUS "[${TARGET_NAME} Options] Cluster disabled")
endif()

###############################################################################
# CMake post initialization
###############################################################################
setupos(${TARGET_NAME})
In detail, the same code as the SDK example that was ran in Getting Started is used.
In this example, a binary named first_app will be generated in build directory. This binary comes from source file first_app.c. An option is added in KConfig HELLOWORLD_CLUSTER which then translates in CMake as a switch CONFIG_HELLOWORLD_CLUSTER. If this switch is set, it is passed down to the code as a define, via target_compile_options CMake command.
This option can be set via:
cmake -B build
cmake --build build --target menuconfig
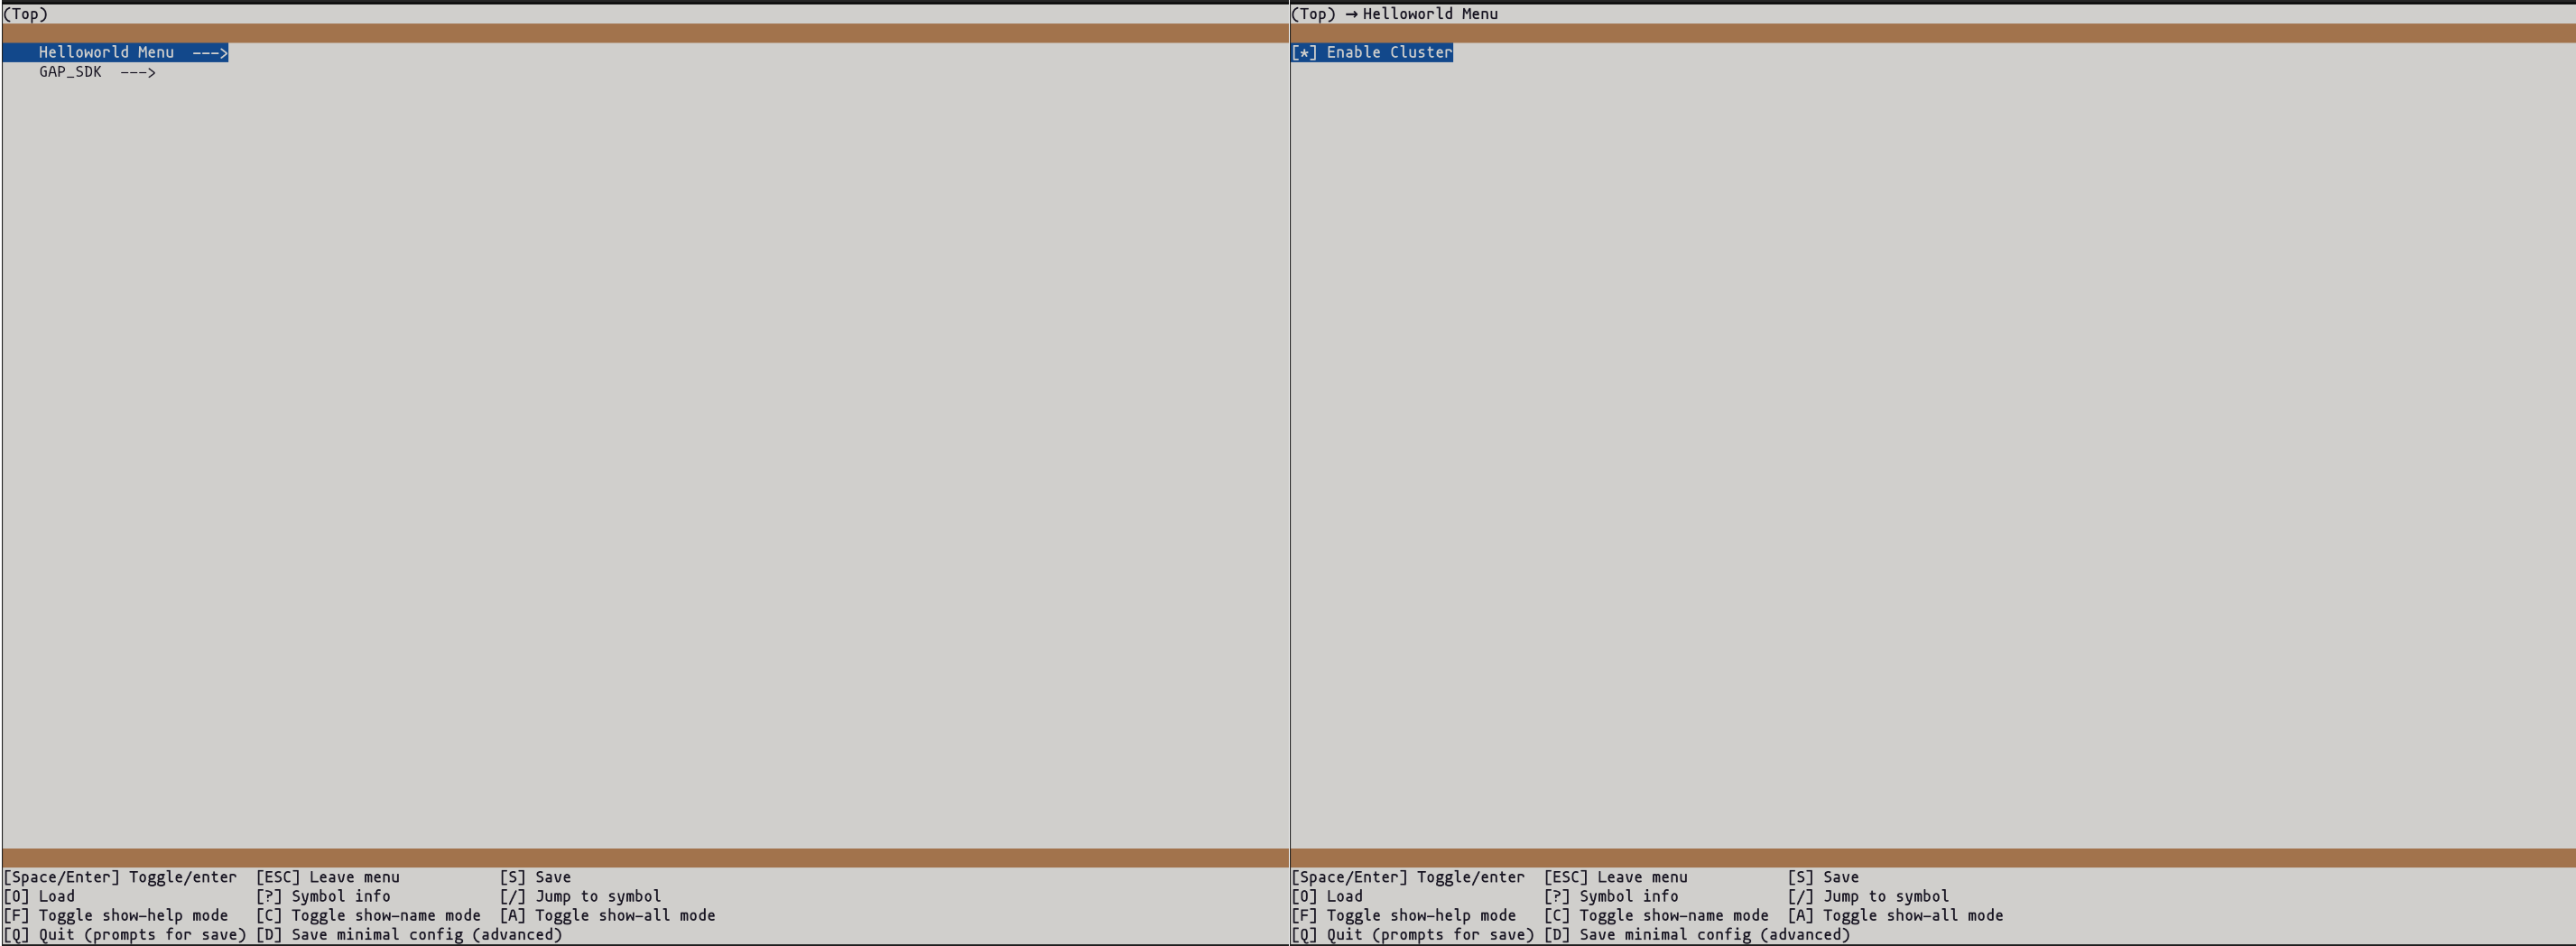
If this option is set, a print will happen on each cluster cores, whereas if disabled, then only the FC will print.
Just as before, run the app:
cmake --build build --target run
Customizing build options
Now that an app has been created, it is possible to tune it. In particular, one may want to change optimization levels, or even the ldscript. Or change runtime parameters such as stack size.
Optimization options can be changed in CMakeLists.txt. Their are two possible scopes: local to app source, or global to the whole runtime.
# This will set first_app.c optimization level to -O3
set_source_files_properties(first_app.c PROPERTIES COMPILE_OPTIONS "-O3")

# This will set -mPE compile flag for the whole runtime
list(APPEND TARGET_CFLAGS -mPE=4)

# This will set -flto for global linker
list(APPEND TARGET_LDFLAGS -flto)
Other flash exist as documented in CMake documentation, and will allow to override options for particular modules. To be noted that one may also use target_compile_options on other targets, or as PUBLIC, thus propagating them to all targets that include this module.
For variables such as stack size, configuration is made under KConfig, more precisely in core menu. There one may set all stack sizes (main, event kernel…) but also choose another linker script (Note that this can be done with TARGET_LDFLAGS too) or default frequencies.
Adding a read only filesystem
Now, a read only filesystem with a single file will be added to the application.
#include "pmsis.h"
// include bsp for filesystem and flash
#include <bsp/bsp.h>

#define QUOTE(name) #name
#define STR(macro) QUOTE(macro)

int main()
{
    /** Readfs from simple file **/

    static pi_fs_file_t *file[2] = {NULL};
    static struct pi_device fs;

    // 17 bytes in file + '\0'
    char file_string[18];

    struct pi_readfs_conf conf;
    pi_readfs_conf_init(&conf);

    conf.fs.partition_name = "readfs_mram";

    pi_open_from_conf(&fs, &conf);

    if (pi_fs_mount(&fs))
        return -1;

    printf("readfs mounted\n");

    file[0] = pi_fs_open(&fs, STR(FILE0), 0);
    if (file[0] == NULL)
        return -2;

    pi_fs_read(file[0], file_string, 16);

    // add a '\0' just for printf purpose
    file_string[16] = '\0';
    printf("Read from file: %s", file_string);

    pi_fs_close(file[0]);

    pi_fs_unmount(&fs);

    return 0;
}
# ....

###############################################################################
# Adding a readfs file --> defaut layout | comment out for version with layout
###############################################################################

# get proper file path
set(FILE0_NAME flash_file_0.bin)
set(FILE0 ${CMAKE_CURRENT_SOURCE_DIR}/files/${FILE0_NAME})

# add compile definitions for the code to find the file
add_compile_definitions(FILE0=${FILE0_NAME})

# Add file to the readfs filesystem
readfs_add_files(FILES ${FILE0} FLASH mram)

###############################################################################
# CMake post initialization
###############################################################################
setupos(${TARGET_NAME})
Hello from file
To add a readfs, four elements are needed:
Readfs driver must be enabled in KConfig (GAP_SDK/Drivers/FS).
One or more files to be added to the filesystem
Adding readfs_add_files(FILES __YOUR_FILES__ FLASH __YOUR_FLASH__) macro to cmake. This will instruct Gapy to add these files to the flash image that will then be used on chose flash.
C code use of pi_fs APIs, with a readfs configuration.
In this example, only one file is used, and is added in cmake with line readfs_add_files(FILES ${FILE0} FLASH mram). The file simply contains “Hello from file”.
In the C code, a pi_device_t structure is declared, named fs, then it is setup using a readfs typed configuration. One point to note: only the name of the file is kept, not its path, i.e. if the file is /home/user/file on the host, on target it will simply be addressed as file.
Adding dump to an host file
Another typical facility provided by the SDK is the ability to dump to an host file. This typically allows to write out the result of an application to the host, either for debug or verifications. This uses semhihosting mechanism and is therefore limited to either using JTAG, or GVSoC.
/** HostFs dump to PC **/
pi_device_t host_fs;
struct pi_hostfs_conf hostfs_conf;
pi_hostfs_conf_init(&hostfs_conf);

pi_open_from_conf(&host_fs, &hostfs_conf);

if (pi_fs_mount(&host_fs))
{
    printf("Failed to mount host fs\n");
    return -3;
}
printf("Hostfs mounted\n");

char *filename = "output_file.txt";
file[1] = pi_fs_open(&host_fs, filename, PI_FS_FLAGS_WRITE);
if (file[1] == NULL)
{
    printf("Failed to open file, %s\n", STR(FILE1));
    return -4;
}
printf("output file opened\n");

char output_string[] = "Hello from GAP9 hostfs";
pi_fs_write(file[1], output_string, strlen(output_string));
Hello from gap9 hostfs
Unlike readfs, hostfs does not requre any changes to the CMakeLists.txt. It does however require enabling its driver in KConfig. One things to note is that path are either absolute, or relative to the build directory. The code is otherwise fairly similar to that of readfs, except that it is now possible to write.
Adding a custom Layout with a Second Stage Bootloader
Now that the app has a filesystem, one might want to customize its flash layout. Either to have multiple filesystems, to support multiple applications or on the contrary to trimm it down. More largely, it may be desirable to prepare space of a Second Stage Bootload in preparation of an OTA. This section will present how to do this.
Before starting on this, it is a good time to actually inspect the current application flash layout.
This is done via this command: cmake --build build --target flash_layout.
One can observe that there are partitions in the external flash, while this app only uses internal flash.
Furthermore, even in the eMRAM, the partition table and volume table are using defaults that could be tuned to either save space, or leave space for OTA.
A custom layout will allow the app developer to choose the most adapted values for those.
To obtain that custom layout, first compile an ssbl binary from utils/ssbl. An more in depth guide can be found at SSBL. Using the default config on GVSoC is enough for this guide.
Next extract the binary from the build folder (binary should be named ssbl) and copy it to the app folder.
Now, prepare a file named custom_layout.json as follows:
{
    "flashes":[
        {
            "name":"mram",
            "sections": [
                {
                    "name": "ssbl",
                    "template": "rom",
                    "properties": {
                        "binary": null,
                        "boot" :" true",
                        "subtype" : "ssbl"
                    }
                },
                {
                    "name": "meta_table",
                    "template": "meta table",
                    "properties": {
                        "ssbl_a": "ssbl",
                        "pt_a": "partition table"
                    }
                },
                {
                    "name": "partition table",
                    "template": "partition table v2",
                    "properties": {
                        "size": 1024
                    }
                },
                {
                    "name": "volume table",
                    "template": "volume table"
                },
                {
                    "name": "app",
                    "template": "app binary",
                    "properties": {
                        "binary": null
                    }
                },
                {
                    "name": "readfs_app",
                    "template": "readfs",
                    "properties": {
                        "files": []
                    }
                }
            ]
        },
        {
            "name":"flash",
            "sections": []
        }
    ]
}
# ....

# Add file to the readfs filesystem, with section name "readfs_app"
readfs_add_files(FILES ${FILE0} FLASH mram PARTITION readfs_app)

###############################################################################
# Setup the SSBL
###############################################################################

# Tell gapy where to find the ssbl, and in which section to put it
# Also set this present app in "app" section, which will be booted by the SSBL
list(APPEND GAPY_RUNNER_ARGS
    --flash-property=${CMAKE_SOURCE_DIR}/ssbl@mram:ssbl:binary
    --flash-property=${CMAKE_BINARY_DIR}/first_app@mram:app:binary)

###############################################################################
# CMake post initialization
###############################################################################
setupos(${TARGET_NAME})
In KConfig, simply enable custom layout option in core and add set custom layout path to custom.layout. Then in the CMakelist, two modfications need to be made: the readfs_add_files call much be modified so as to add a PARTITION readfs_app argument. This instructs gapy to add the files in the section readfs_app instead of the default readfs_mram. Secondly, GAPY_RUNNER_ARGS needs to be appended with two flash properties as above. These indicate where to find the ssbl and the app respecively. And set them in their respective sections.
Finally, in the C code, readfs configuration must be updated with partition name readfs_app.
At execution, the SSBL nows boots first, and then chainload the application. If the application were to be corrupted, or if an update is needed, the SSBL can now handle it. To read more on using the SSBL and updates, please refer to SSBL and Host GAP CLI.
To learn more about custom layouts and their use, follow the documentation at Flash management.
Last notes
To avoid having to re-run cmake --build build --target menuconfig every time, it is possible to freeze the configuration
of the app.
This is done by using cmake --build build --target freezeconfig.
The resulting file, sdk.config will be filled as such in the case of this application:
CONFIG_HELLOWORLD_CLUSTER=y
CONFIG_DRIVER_UDMAOCTOSPI=y
CONFIG_DRIVER_UDMAAES=y
CONFIG_DRIVER_CLUSTER_L1MALLOC=y
CONFIG_DRIVER_QUIDDIKEY=y
CONFIG_DRIVER_CRC32=y
CONFIG_DRIVER_TYPE_FLASH=y
CONFIG_DRIVER_MX25U51245G=y
CONFIG_DRIVER_MX25U51245G_BAUDRATE_DEFAULT=y
CONFIG_DRIVER_MRAM=y
CONFIG_DRIVER_HOSTFS=y
CONFIG_DRIVER_READFS=y
CONFIG_READFS_FLASH_TYPE_MRAM=y
CONFIG_DRIVER_PARTITION=y
CONFIG_DRIVER_FLASH_PARTITION_V2=y
CONFIG_FLASH_LAYOUT_CUSTOM=y
CONFIG_FLASH_LAYOUT_PATH="custom.layout"
These options can also be written directly, without going through menuconfig at all.
This means that for the step of enabling the readfs driver, manually adding CONFIG_DRIVER_READFS=y to sdk.config would be valid.